Easy Peanut Butter Protein Cookies That Kids Can Bake

After having completed an 11,000 mile road trip one of the biggest things we missed being on the road was baking. There is something magical about the smell of something scrumptious wafting from the oven and the delicious anticipation of actually being able to then eat it once it’s done. Yep. That excitement is not easily replicated even if you were to buy baked goods on the road. 

(Un)Fortunately, for us, we don’t eat wheat and are gluten-free so even buying a baked good on the road proved to be difficult since everything is made out of wheat. Sigh. Nonetheless, we managed and are probably a whole lot better off! We did snack on some of the most delicious, fresh produce though, which was exciting.


So now that we’re home and Fall has arrived, we’re starting to find excuses to bake. The weather has been dark and gloomy in NJ the last few days, which provided the perfect excuse to treat ourselves. 

Now that my boys are ages 7 and 5, they are quite independent and do so many things on their own. One of best things to get them involved in is baking. Kids love to bake! But admittedly, certain recipes are just too complicated for them, so when I let them bake on their own, I try to look for recipes that have minimal ingredients but doesn’t sacrifice flavor. This peanut butter protein cookie recipe from asweetpeachef.com fit the bill! Four ingredients, and, more importantly, no wheat! 


This was super easy for the kids to make on their own! I just put the cookies in the oven once they finished. 

Hope you enjoy this recipe as much as we did!

Peanut Butter Protein Cookies Recipe


Here’s the recipe:

1 cup All Natural Peanut Butter 

2/3 cup Coconut Sugar

2 scoops protein powder 

1 teaspoon Vanilla extract (optional)

2 eggs

Instructions:

1. Preheat oven 350 degrees F. Spray baking sheet with oil and set aside.

2. In a large bowl, mix nut butter, coconut sugar, protein powder, vanilla extract, and eggs. Combine well. (Note: some nut butters are creamier than others, so if your mixture is too liquidy, just add more protein powder and adjust). 

3. Scoop two tablespoons of cookie dough into your hands and roll until you form a ball. Flatten the ball between your palms and place carefuly on the baking sheet. Repeat until finished.

Optional – the kids wanted to make Darth Vader cookies because why not? So they quickly took our Darth Vader cookie cutters and imprinted them on top of the soft cookie dough. You could do just leave it simple and as is! 

4. Place cookies in the oven and bake for 10-12 minutes. When finished, remove from oven, and let cookies cool 5-10 minutes before serving.

Enjoy!


A Stormy Night In The Badlands (Part 1)

We’ve driven over 2,000 miles across the country to end up in the Badlands of South Dakota! Seeing these incredible geological deposits is astounding. They are beautiful and  mysterious, practically begging you to ask, what was Manifest Destiny truly all about? What prompted the first American pioneers to want to claim even the most hostile of lands like the Badlands and make it their own? I’ve yet to arrive at the answers. 


Nevertheless, we decided to make the most of our time there. The first night, we camped in a campground inside the park. We chose a spot furthest away from everyone (as we always do) and happily settled in. We noticed there was a bit of a breeze going, but didn’t think much of it. As we sat down to dinner, the slight breeze turned into full-blown strong winds and we could see an impressive lightning show in the distance. By the time we tried to settle in for he night, our camper was rocking terribly! It was being pushed around by the wind so much, that Matthew and I actually moved everyone out of the camper and into the car for safety. We looked up the weather and, apparently,  a severe storm had developed. Winds were gusting between 45-50mph (yikes!).  Then the heavy rains came. There was nothing left to do but wait the storm out and pray that our camper didn’t blow over.

Thankfully, after two hours, the wind died down and all we had to deal with was the rain. When morning came, it was as if the storm never happened. The sun shone brightly and the Badlands looked completely untouched. 

My boys were back to running around and climbing.


They even made friends with another sweet little boy in the campground named Logan. 


 Baby girl got her chance to run around too. She spotted some beautiful wild horses in the distance and tried to run after them! 


After breakfast, we packed up and decided to head to a remote part of the park where there is no cell signal, no amenities, and where the buffaloes roam. 


Just Beet It, Gluten-Free Beet Brownies

My 7-year-old once told me half-jokingly, half in admiration, “Mom, you’re like a mad scientist in the kitchen!” I suppose if there were a more apt description of my approach to cooking, it would be that. I love to take foods that you normally wouldn’t consider as something that would go together and I bend the rules and make it work anyway. Thankfully, my creations so far have resulted in surprisingly delicious flavor blends.

And I’m excited to share them with you! Last week, as part of our CSA box, we received these beautiful organic beets. I was so thrilled because our family loves betters. Typically, we love to add them to salads, saute or grill them. But the beets that we got were a bit on the small side and there weren’t really enough of them to have enough for a side dish.


So I sat there thinking, what could I do with these beets? And then a light bulb went on! I have made spinach brownies, carrot brownies, why not make beet brownies?

The key to making these brownies is to shred the beets thinly.


I saved the beet greens because they are delicious sautéed!

And from here, it was a matter of mixing the wet ingredients with the dry.

The result is this ooey-gooey, super decadent, fudgey brownie that is just pure heaven! In case you’re wondering, if the brownie taste too beet-like, I had my kids and my husband try to guess what the secret ingredient was and they didn’t have a clue. Win-win!

I topped my brownies with chocolate frosting that I quickly made from scratch. Chocolate on top of chocolate? Yes, please!

I highly encourage you to give these brownies a try!

Brownie Recipe

  • 2 1/2 cups brown rice flour
  • 2 teaspoons baking powder
  • 1/2 cup unsweetend cocoa powder
  • 1/2 cup pure maple syrup
  • 1-2 cups raw beets
  • 1 tsp pure vanilla extract
  • 1/2 cup unsweetened almond milk
  • 1 cup coconut oil (melted)
  • 4 eggs

Dark Chocolate Frosting

  • 1 cup dark chocolate
  • 1/2 cup thick coconut cream (I got mine from Trader Joe’s)
  • 2 tbsp pure maple syrup

Instructions

  1. Preheat oven to 350 degrees. Grease an 8×8 glass baking dish.
  2. Combine beets, maple syrup, vanilla, almond milk, eggs, and coconut oil. Fit together flour, baking powder, and cocoa powder. Slowly incorporate the dry ingredients to the wet ingredients. Food in until completely mixed well.
  3. Pour brownie mixture into baking dish. Bake for 40-45 minutes or until it passes toothpick test (toothpick comes out clean). Cool completely.

Frosting instructions

  1. In a saucepan, melt dark chocolate slowly over low heat.
  2. Once the chocolate has completely melted, remove from heat and mix in coconut cream and maple syrup. Whisk until well combined.
  3. Place in fridge to cool and to allow to set slightly so it becomes a little firm.
  4. Once brownies have completely cooled, spread the frosting over the brownie. Enjoy!

Firelight Camps – Luxurious Camping In The Fingerlakes

We love to camp as a family, but the truth is, ever since we had our little girl this past June, we weren’t able to go camping. Just the thought of packing for three kids on top of our tent, our sleeping bags, and all our camp cooking essentials just made me even more exhausted than I already am as a homeschooling mom of three!

So when I stumbled on to Firelight Camps in Ithaca NY, a “glamping” (glamorous camping) experience, I convinced my husband to jump on the opportunity to give it a try. Firelight Camps offered the best of both worlds, being out in nature while still maintaining creature comforts like king-sized beds and daily complimentary breakfasts. We are so glad we decided to give them a try!

Here are a few pictures from our trip:

IMG_0467

We stayed in Tent #9, which accommodated a king-sized bed and a double where my boys slept.

IMG_0219

IMG_0235
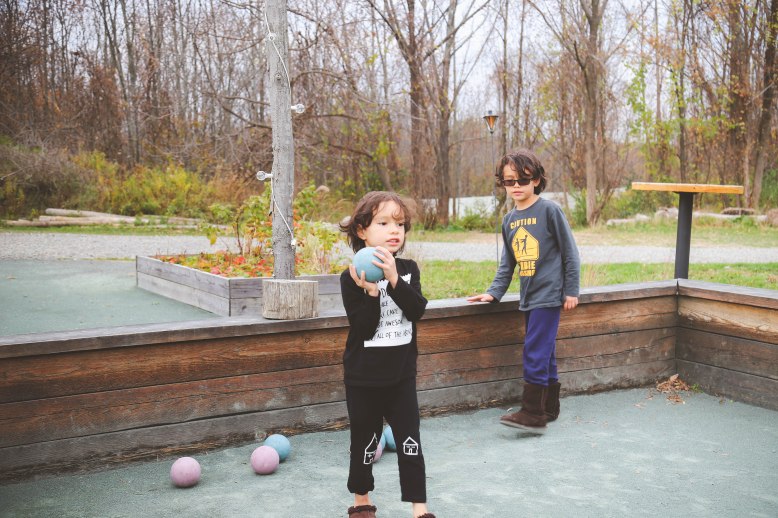
The boys playing bocce ball at Firelight Camps

IMG_0215-2

We also spent some time doing easy hikes. One of our favorite ones was hiking to Lucifer Falls in Robert H. Treman Park. It is GORGEOUS there!

IMG_0268

IMG_0370

We explored a little bit of Ithaca, stopping by the town commons and checking out the famous Farmer’s Market.

IMG_0241

We had a really great time. I don’t think I’d give up regular campig, but glamping certainly has a place in my heart now!

15 Minute Gluten-Free Chewy Snack Bar Kids Will Love

 Being a mom of three, I am always experimenting with being able to make healthy and delicious foods in a jiffy. One of the things I’ve come to realize is that my kids love snack bars. But store-bought snack bars are either expensive and/or loaded with too much sugar. So one day I started studying the ingredients of the snack bars that I bought and decided to see if I could come up with something just as delicious in the kitchen.

As it turns out, snack bars are SO EASY to make! All you need is solid base to start the bars off with and from there, you can throw in whatever suits your fancy. Here is the recipe for one of our favorites:

11779919_770362730423_6050650980870877963_o

1 cup of pitted medjool dates
1 1/2 cups gluten-free oats
1 tbsp raw chia seeds
1 tbsp raw flax seeds
1 tbsp raw hemp seeds
1/2 cup almonds
1/4 cup maple syrup
1/4 cup sunflower butter

1. Throw the cup of pitted medjool dates in the blender and blend on high for a few seconds until the dates form a soft clump.

2. Transfer the dates into a large bowl and add in the oats, chia seeds, flax seeds, hemp seeds, and almonds.

3. Combine the maple syrup and sunflower butter and heat until hot but not boiling. Remove from heat.

4. Pour the maple syrup and sunflower butter mixture into the bowl. Mix well.

5. Spread the entire mixture on an 8×8 glass container lined with parchment paper for easy removal (optional).

6. Pop in the freezer for 15 minutes so it sets.

Enjoy!
 

A Baby Girl On The Way and My Maternity Photos

I took a long break from blogging after I found out I was pregnant with our third child. This pregnancy felt completely different from my first two. The first trimester I was running to the bathroom A LOT. I don’t remember that with my first two boys, so when I found out that I was having a girl, it made all the sense in the world that I was undergoing a different experience.

I am currently on my 37th week now and I am definitely starting to feel the excitement that we could expect our little girl soon. We’ve been doing so much preparation in our house for her arrival that this pregnancy feels like it has just flown by. I had contemplated on doing maternity photos, but felt too tired, big, and just plain old grumpy to go through with it. Thankfully, I have an extremely supportive husband who convinced me I would regret it if I didn’t. And so, I approached my brother’s girlfriend who has a passion for photography and she my brother were so gung-ho and excited to help me out, I couldn’t resist.

I knew that I wanted an “out-of-the-box” maternity shoot. And so I came up with the concept and my brother and his girlfriend helped me figure out how to achieve what I was looking for. These photos are a result of our collaboration. I am so glad I decided to do these photos. I can’t wait to share them with my girl one day!

Sun Salutation

Sun Salutation

Ahamkara Mudra  (energistic symbol of confidence and self-assertion for my baby girl)

Ahamkara Mudra
(energistic symbol of confidence and self-assertion for my baby girl)

Utkata Konasana (Goddess Pose)

Utkata Konasana (Goddess Pose)

Meditation

Once Upon A Time There Was A Celebration Spinach Salad with Sweet Apple Vinaigrette & Walnut Parmesan

I once stumbled on to this meme that said, “No great story ever started with a salad.” Boy, was that meme ever wrong! Fairy tales practically start with salads nowadays. Ok, maaaaybe not really. But salads have turned over a new leaf (ha!) and are as far from boring as they could be. Salads with the right dressings can go from everyday ordinary to a celebration!

I adapted this recipe from the Oh She Glows Cookbook and made it a little bit my own. Some days, when I am in the mood for something light but delicious, I make variations of this. I think it goes great with everything and is robust enough to be a standalone meal.

IMG_2512.JPG


Serves: 4 to 6

Prep time: 20-25 minutes

Cook Time 7-9 minutes


FOR THE WALNUT PARMESAN:

1/2 cup walnuts, toasted

1 1/2 tsp shredded parmesan cheese

1 1/2 to 3 tsp extra virgin olive oil


FOR THE DRESSING:

3 tbsp apple cider vinegar

2 tbsp plus 1 tsp fresh lime juice (you can also use lemon)

2 tbsp pure maple syrup

12 tsp ground cinnamon

1/4 tsp fine sea salt

1 tbsp grapeseed oil (you can also use extra virgin olive oil)

2 tbsp unsweetened apple sauce


SALAD

2 cups spinach

1 apple cored and finely chopped

1/4 cup craisins

1/2 cup grape tomatoes


1. Make the walnut parmesan: preheat oven to 300 degrees F. Spread the walnuts in a single layer on a baking sheet and toast in the oven between 7-9 minutes. Set aside to cool.

2. Chop the walnuts by hand or in a mini food processor. In a small bowl, combine toasted walnuts, shredded parmesan cheese, oil, and salt until mixture gets crumbly. Set aside.

3. Make the dressing: In a small bowl, mix thoroughly the vinegar, lime juice, maple syrup, cinnamon, salt, oil, and applesauce.

4. To assemble the salad, place the spinach in a large bowl and pour on the dressing. Toss the spinach salad with the dressing until the spinach is fully coated. Top the spinach with the apple, craisins, and grape tomatoes. Sprinkle the walnut parmesan over the salad just before serving.

Our Anti-Aging Immune Boosting Shake/Smoothie Ingredient Musts

We have had one of the most incredibly busy two weeks of our lives. From traveling down south to spend time end our summer in the Carolina coasts to having my in-laws visit, our days have been a blur of activity. Now that school (kindergarten for my oldest) is in full swing, it’s difficult to imagine a day where we are not almost always on the run from one activity to another. This type of schedule can sometimes take a toll on health, especially now that Fall is right at our doorstep.

I am starting to take a more serious approach to bolstering our immune systems. I read last night about a respiratory virus that is causing children in Colorado to be hospitalized. It’s troubling and although it’s a few thousand miles away from us, I am not dismissing it, as things do have a tendency to spread quickly. So we have made a decision to make our health a priority, starting especially, with what foods we eat.

One of the best ways to get as many veggies into your diet as possible is through a shake/smoothie. While some people use ready-to-made blends, we prefer to use fresh as many fresh ingredients as possible. Using fresh ingredients does require a good quality blender. We bought a Vitamix a few years ago and I have to say, it has been worth it for us. We have blended countless carrots, kale, spinach, beets, fresh ginger, turnips, and even mustard greens into our shakes and our Vitamix has performed beautifully every single time.

I had this shake this Blueberry based shake this morning:


IMG_2495.JPG

While the fruits and veggies vary a great deal on our shakes, here are the ingredients that always make it on our list.

FRESH ORGANIC SPINACH – a very nutrient-dense green that is also low in calories! Among other things, spinach is an excellent source of vitamin K, vitamin A, magnesium, folate, manganese, iron, calcium, vitamin C, vitamin B2, potassium, and vitamin B6. Basically, it’s all the good stuff we need.

RAW CHIA SEEDS – chia seeds are tiny black seeds from the plant Salvia Hispanica that grows in South America. This seed was extremely important to the Aztecs and Mayans, and the word “chia” is actually the Mayan word for “strength.” Just like spinach, chia seeds are low in calorie, but dense in nutrients. In addition to this, it is also loaded with antioxidants.

RAW FLAX SEEDS – another seed loaded with vitamins and antioxidants, flax seeds also aid in digestive health, reduction in bone loss, and increase immunity.

RAW GINGER – this herb has been used in traditional medicine in many countries and cultures across the world. it’s known to have more than 12 antioxidants in addition to containing essential oils, protein, calcium, phosphorus, iron, vitamin C, choline, folate, inositol, manganese, panthotenic acid, silicon, and a small amount of vitamin B3.

RAW HEMP SEEDS – our household cycles back and forth between eating meat and being vegetarian. we think this is important for optimum health. hemp seeds are considered a “superfood,” because not only are they, like the others above, loaded with vitamins and antioxidants, but they also a great protein supplement for those who do not eat animal products.

RAW ALMONDS – though typically considered a nut, almonds are actually the seeds of the almond tree! almond skins alone contain an abundance of antioxidants while the almond itself is low in saturated fat, trans fat, and sodium.

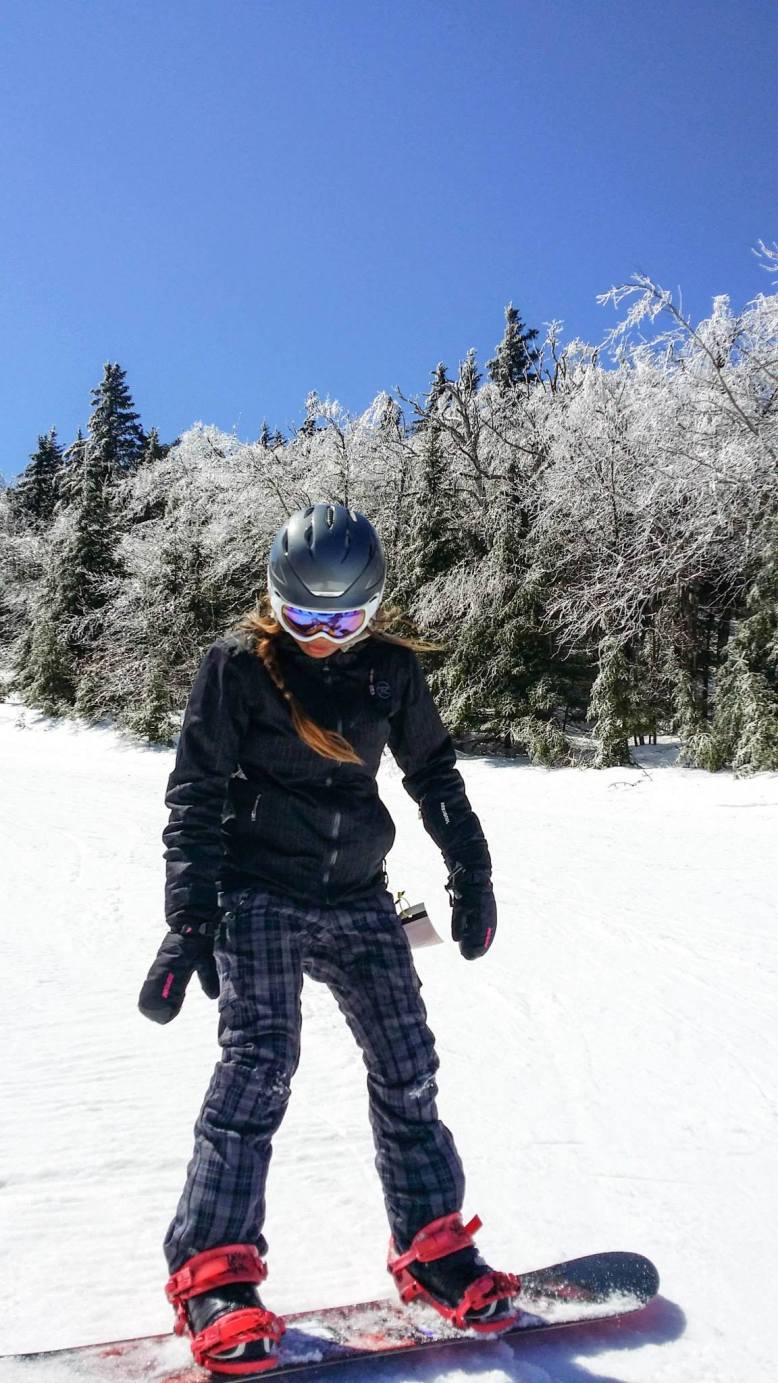
We have found great benefits to incorporating these ingredients into our shakes on a daily basis. As a family, we rarely get sick. We are a snowboarding family and are outdoors all winter long. My two children get sick at most, maybe 2x a year, 1 mild cold in the fall/winter and seasonal allergies in the spring, which I am still working on finding ways to alleviate using natural means. And, predictably, the colds usually come after the holidays, when we’ve been feasting on one too many treats and goodies from family gatherings. When this happens, we whip out our Vitamix and take it from there.

1979215_685484896283_8720454873367353354_o

Snowboarding2014

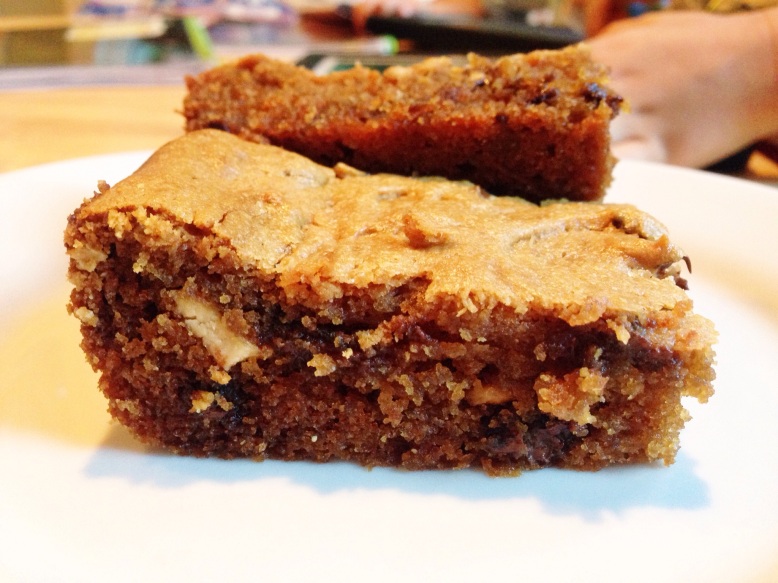
No Flour All Natural Chocolate Chip Peanut Butter Blondies

I cant make enough of these!

IMG_2426.JPG

I couldn’t even take these photos without my 5 and 3-year-old hovering in the background, eagerly awaiting to take bites. We are BIG nut lovers in our household, so this treat always hits the spot.

Ingredients

1 cup natural creamy peanut butter
1/3 cup honey
2 whole eggs (if your peanut butter is very runny, stick with 1 egg)
1/4 teaspoon sea salt (ONLY add if you are using unsalted peanut butter)
1/2 teaspoon baking soda
1/2 cup semi-weet chocolate chips (dark chocolate works great too!)

1. Preheat oven to 350F and grease an 8″ square pan.

2. In a bowl, mix the peanut butter, honey, egg, salt and baking soda until mixed thoroughly. Then fold chocolate chips in.

3. Bake in oven for 20-25 minutes or until top is a light golden brown.

4. Let cool and serve warm! Enjoy!
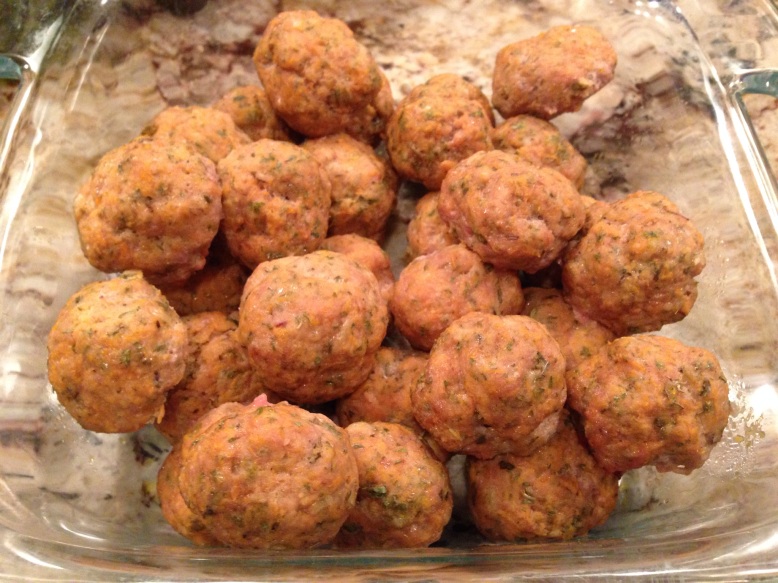
Baked Sweet Potato Turkey Meatballs

We spent a lot – a lot – of time with family this weekend. It was my sister’s 26th birthday and, celebrations started on Friday evening with dinner at my house. Whenever I have to make dinner, I always try to make something sophisticated enough for adults to enjoy, but also fun enough for kids to want to eat. It also has to be healthy and easy because I don’t want to spend all day in the kitchen!

The one food that I could think of that fit the bill in this instance were turkey meatballs. I also had two good-sized sweet potatoes that I wanted to use, so I figured combining the two would make for a delicious dinner. And I’m so happy it came out exactly how I wanted! My sister kept raving about how the grated sweet potatoes stayed firm in the baking process and gave the meatballs a bit of a crunch. I’m looking forward to making these again!


IMG_2400.JPG

Ingredients

  • 1 pound ground turkey breast
  • 1 egg
  • ½ cup finely grated sweet potato
  • 2 tablespoons oatmeal or breadcrumbs
  • 2 tablespoons parsley
  • ½ teaspoon salt
  • ½ teaspoon pepper
  • 1 clove garlic, minced
  • 2 tablespoons grated Parmesan (optional)
  • 2 tablespoons grated Romano (optional)
  1. Set oven to 350ºF and lightly spray with oil a large baking tray.
  2. Combine all ingredients in a large bowl and mix thoroughly.
  3. Portion by tablespoons onto the tray. You will get about 24 balls. To get more, I just doubled the ingredients.
  4. Bake 15-20 minutes or until firm and lightly brown.